
Business Connectivity Guide
Business Ethernet & Networking
Cable types, switches, PoE explained, and step-by-step how-to guides for building a reliable wired network in your business premises.
Why Wired Still Matters
Wi-Fi is convenient, but a wired Ethernet backbone is still the backbone of any serious business network. Here's how the two compare where it actually counts.
| Factor | Wired Ethernet | Wi-Fi Only |
|---|---|---|
| Speed & Bandwidth | Consistent, up to 10Gbps+ per port | Shared across all connected devices |
| Reliability | Stable, unaffected by interference | Prone to drops, congestion, dead zones |
| Latency | Very low, ideal for VoIP & video | Higher, variable under load |
| Security | Physical access required to tap in | Broadcast signal, needs strong encryption |
| Interference | None | Affected by walls, other networks, devices |
| Scalability | Add ports/switches as you grow | Limited by access point capacity |
| Setup Cost | Higher upfront (cabling & install) | Lower upfront |
Verdict: Use wired Ethernet for anything fixed and performance-critical — desktops, servers, PoE phones, tills, CCTV — and let Wi-Fi handle mobile and guest devices. Most reliable business networks use both together.
Understanding Cable Types
Not all Ethernet cable is the same. Choosing the right category affects speed, future-proofing, and reliability — here's how the common types compare.
| Cable Type | Max Speed | Max Distance (Full Speed) | Shielding | Typical Use |
|---|---|---|---|---|
| Cat5e | 1 Gbps | 100m | Unshielded (UTP) | Basic office data & VoIP phones |
| Cat6 | 1 Gbps (10 Gbps up to 55m) | 100m (1 Gbps) / 55m (10 Gbps) | Unshielded (UTP) | Standard modern office installs |
| Cat6a | 10 Gbps | 100m | Shielded (STP) or unshielded | Future-proofed offices, server links |
| Cat7 | 10 Gbps+ | 100m | Fully shielded (S/FTP) | High-interference environments |
| Cat8 | 25–40 Gbps | 30m | Fully shielded (S/FTP) | Data centres, short server-rack runs |
Verdict: For most business offices, Cat6 hits the sweet spot of cost and performance. Choose Cat6a if you're future-proofing or running cable near heavy electrical interference, and save Cat7/Cat8 for data cabinets and server-to-switch runs rather than general office wiring.
Network Switches Explained: Layer 1, 2 & 3
Not all switches do the same job. Understanding what "Layer" a device operates at explains why a cheap switch behaves very differently to a managed one.
Hubs & Unmanaged Switches
The most basic option. A Layer 1 device (like an old-style hub) simply repeats every signal to every port with no intelligence — this creates collisions and is rarely used in modern networks. Cheap "unmanaged" switches are technically Layer 2 but behave with almost no configuration, acting close to plug-and-play.
Standard Managed Switches
Layer 2 switches read MAC addresses and forward traffic only to the correct port, dramatically reducing unnecessary traffic. Managed Layer 2 switches add VLANs, port monitoring, and traffic prioritisation (QoS) — the standard choice for most office networks.
Routing Switches
Layer 3 switches combine switching with routing, allowing traffic to move between different VLANs or subnets without a separate router. Common in larger offices, multi-floor buildings, or anywhere network segmentation and internal routing speed matter.
Verdict: Small offices are usually fine with a managed Layer 2 switch. Once you have multiple departments, VLANs, or floors that need to talk to each other efficiently, a Layer 3 switch earns its keep.
Understanding PoE (Power over Ethernet)
PoE lets a single Ethernet cable carry both data and power — no separate power lead needed for phones, cameras, or access points. There are three standards, each providing more power than the last.
PoE
Up to 15.4W per port. Enough for basic VoIP phones and simple IP cameras.
PoE+
Up to 30W per port. Covers most Wi-Fi access points and pan-tilt-zoom cameras.
PoE++
Up to 60–90W per port. Needed for high-power access points, some laptops, and video conferencing units.
Choosing the Right Switch Size
Switches (and PoE injectors) come in a range of port counts. The right size depends on how many wired devices you need to connect now, plus room to grow.
1-Port PoE Injector
Best for: adding PoE power to a single device — like one extra access point or camera — without replacing your whole switch.
5-Port Switch
Best for: a very small office, home-office setup, or extending a network to a small side room.
8-Port Switch
Best for: small offices or shops with a handful of desks, a till, and a couple of Wi-Fi access points.
16-Port Switch
Best for: growing small businesses — multiple desks, phones, cameras, and access points on one switch.
24-Port Switch
Best for: medium offices or a single floor of a larger building, often paired with a patch panel of the same size.
48-Port Switch
Best for: larger offices, multi-floor buildings via a core switch, or a comms cabinet serving many rooms at once.
Verdict: Always size up slightly beyond your current device count — patch panels and switches are cheapest to buy right the first time, and running out of ports later means an unplanned second switch and extra cabling.
How-To: Fitting an RJ45 Plug to Cat5e/Cat6 Cable
Terminating your own cable is a genuinely useful skill for running a short extra Ethernet lead or fixing a damaged plug. Here's the standard T568B method used across most UK business installs.
Tools & Materials Needed
- RJ45 crimping tool
- RJ45 plugs (Cat5e or Cat6, matching your cable type)
- Cable stripper or a sharp utility knife
- Ethernet cable tester (to confirm the finished job)
-
1
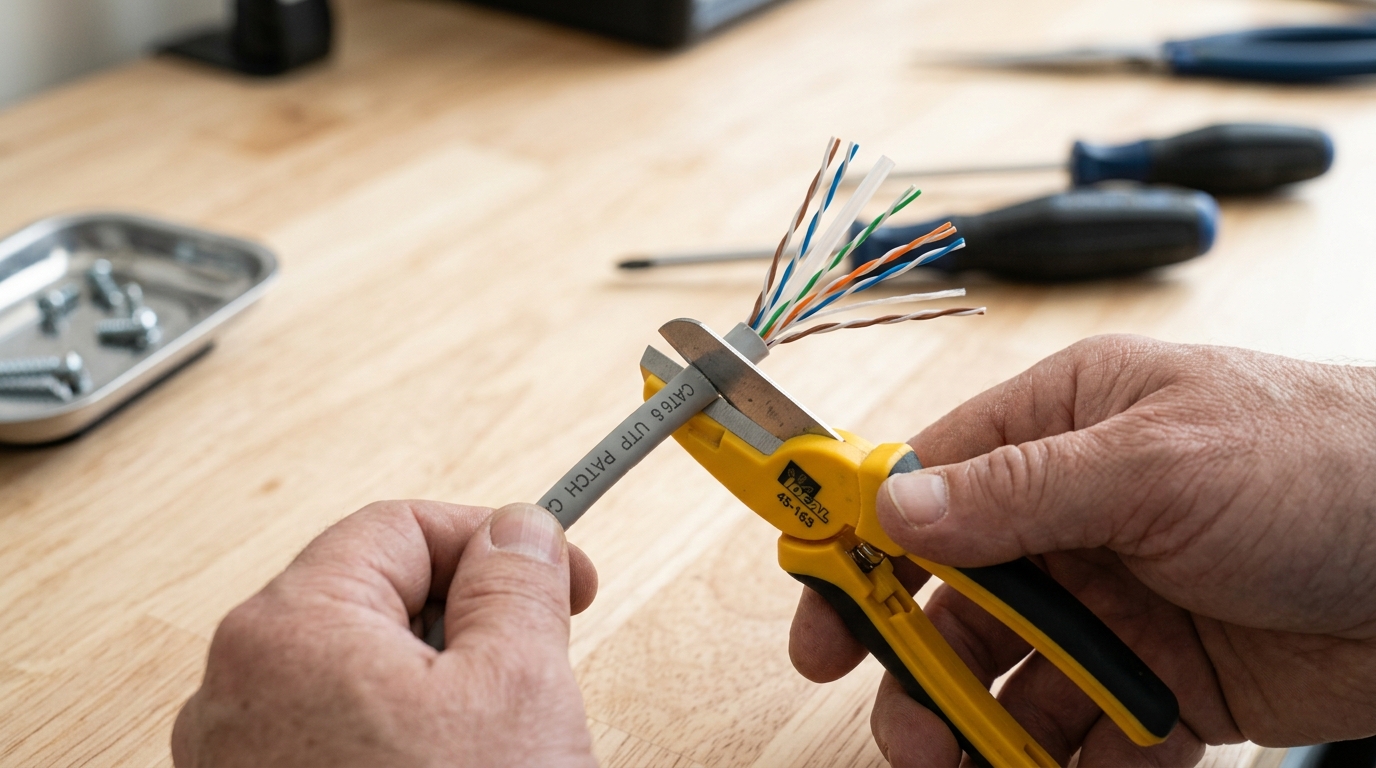
Strip the outer jacket
Strip back roughly 3cm of the outer cable jacket, being careful not to nick the coloured wires inside.
-
2
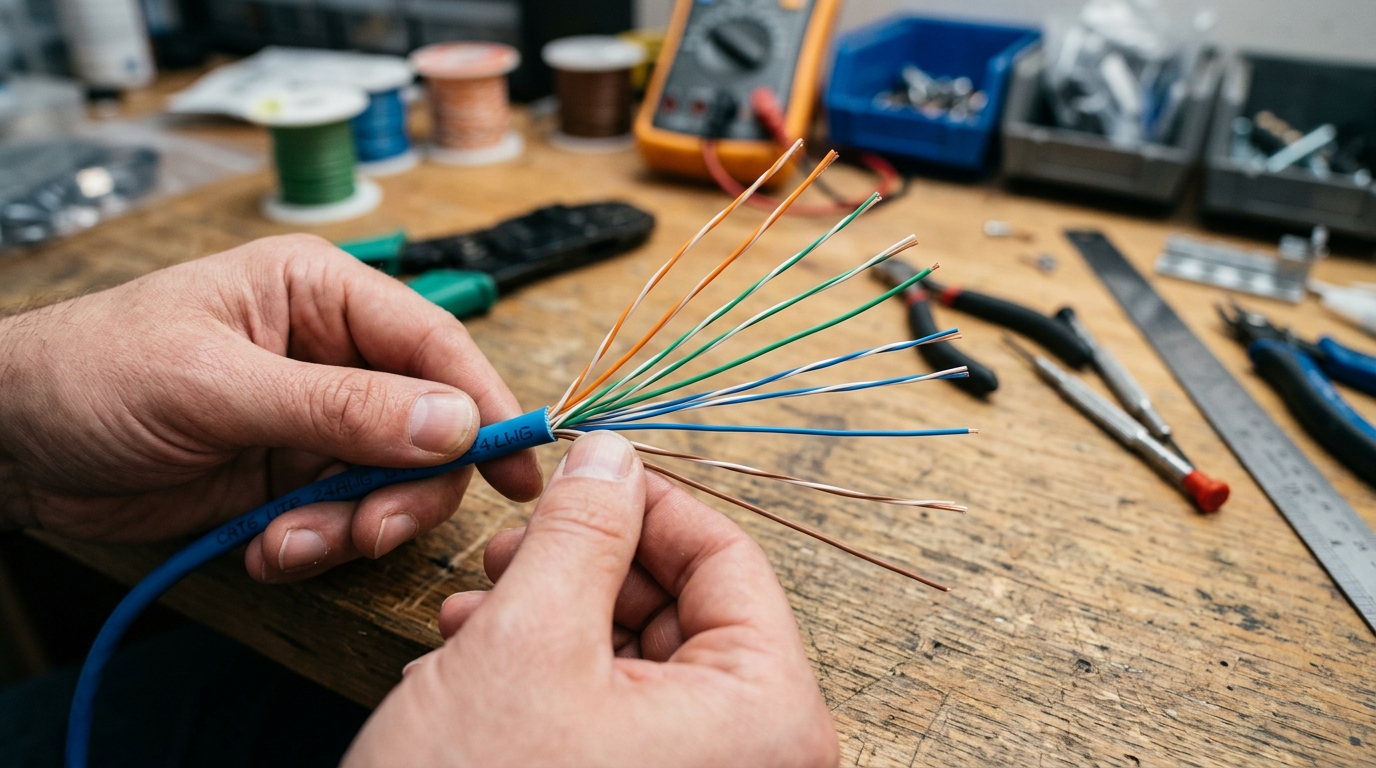
Untwist and straighten the pairs
Untwist the four coloured wire pairs and straighten them out flat so they lie side by side in order.
-
3
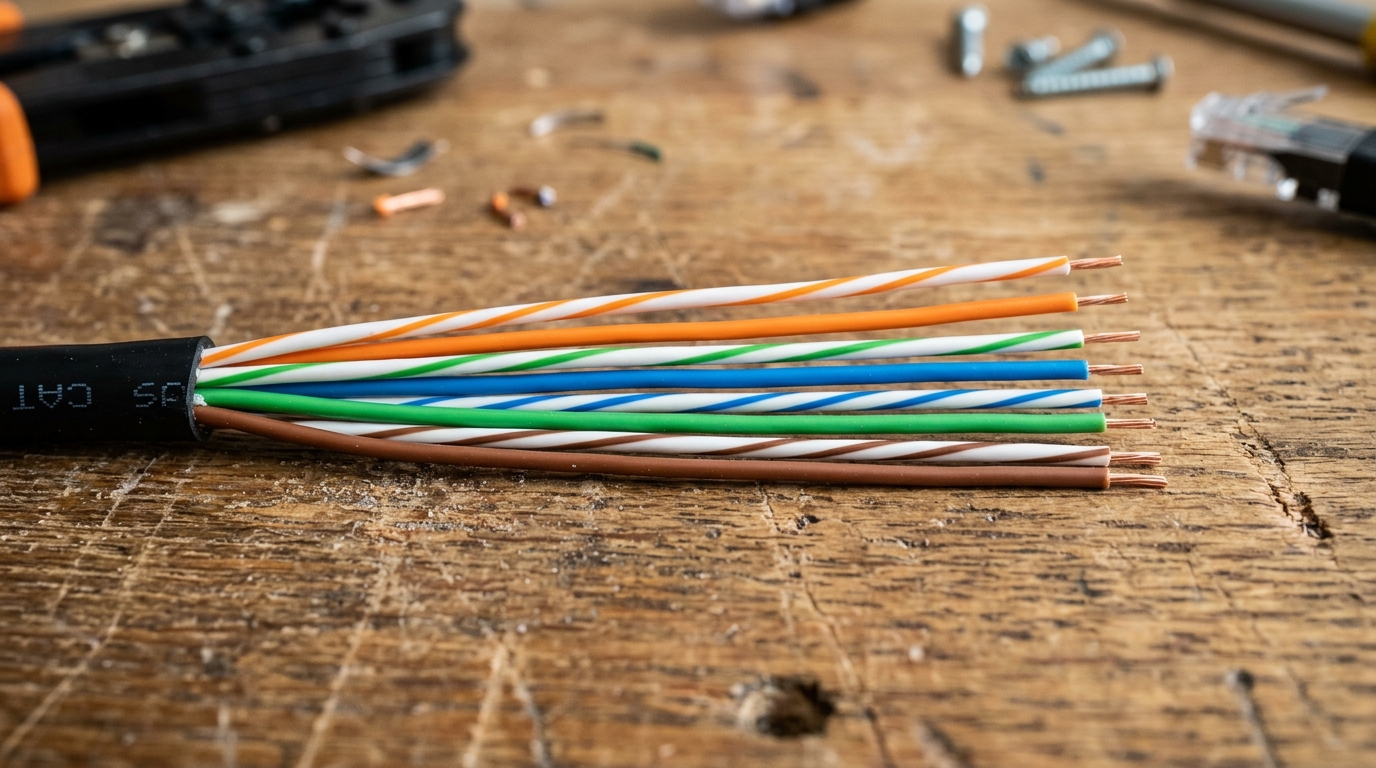
Arrange to the T568B standard
Order the wires left to right as: white/orange, orange, white/green, blue, white/blue, green, white/brown, brown. This is the T568B standard used on almost all UK business installs.
-
4
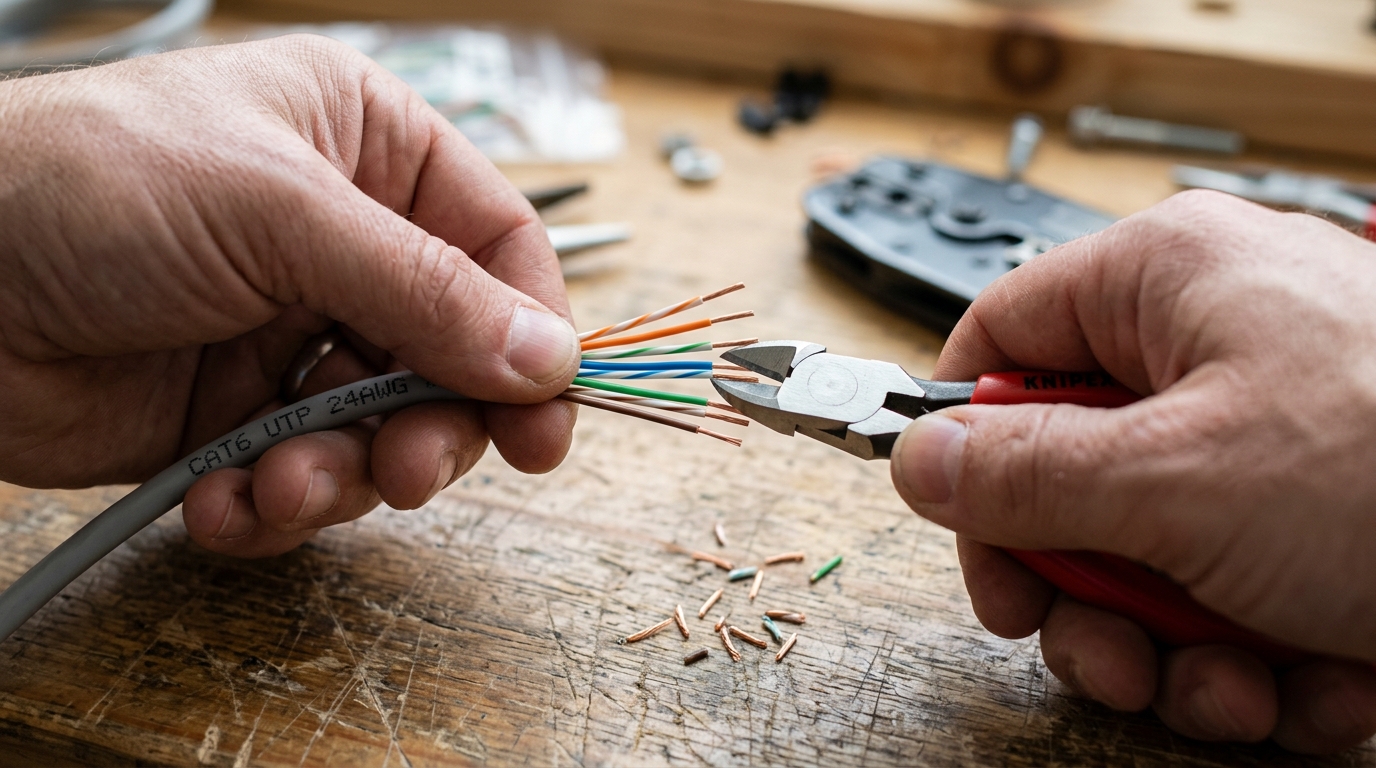
Trim to an even length
Trim the wires so they're flat, even, and about 1.2–1.5cm long from the edge of the outer jacket.
-
5
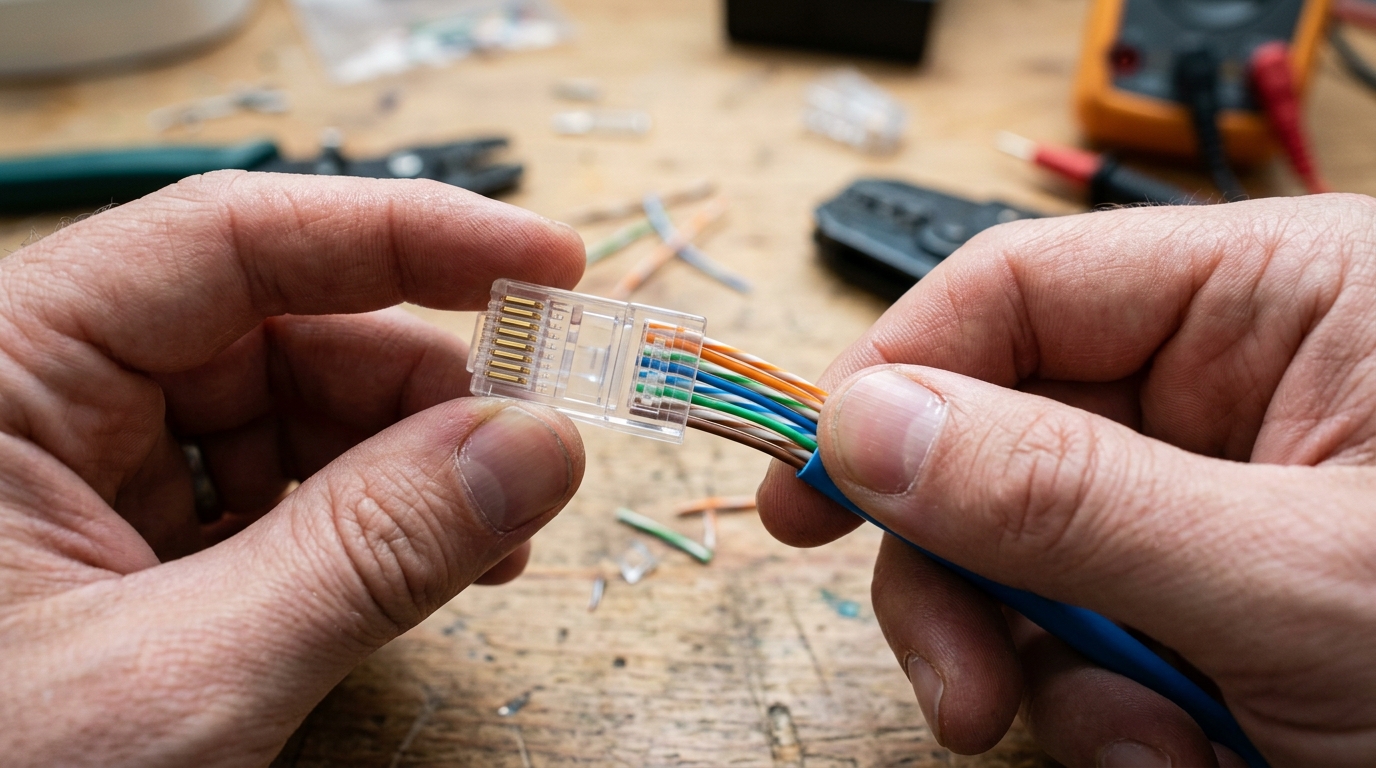
Insert into the RJ45 plug
Slide the wires fully into the plug, keeping the order intact, until each wire reaches the very front of the plug and the outer jacket sits just inside the back.
-
6
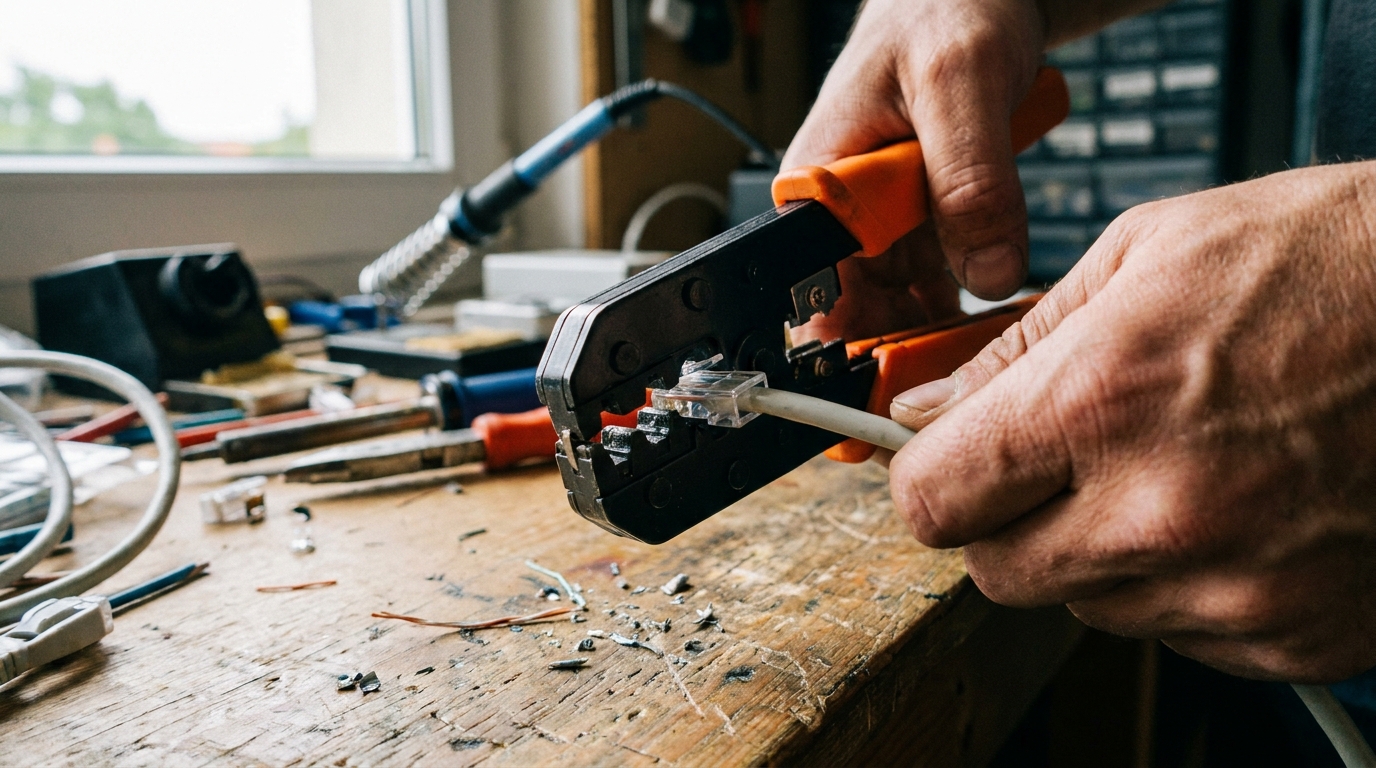
Crimp the plug
Place the plug in the crimping tool and squeeze firmly. This pushes the internal pins down through each wire's insulation and clamps the jacket in place.
-
7
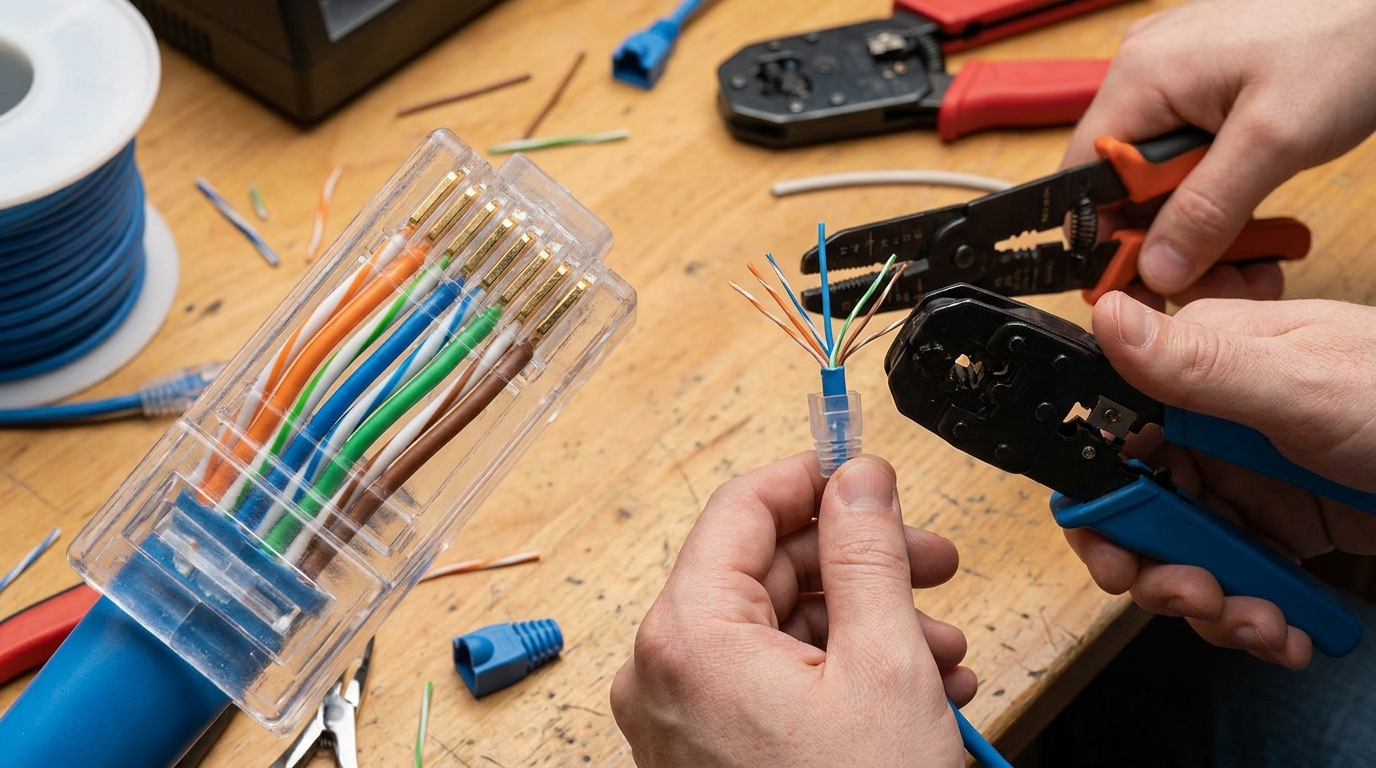
Repeat on the other end
Terminate the other end of the cable the same way — always use the same standard (T568B) on both ends for a straight-through patch cable.
-
8
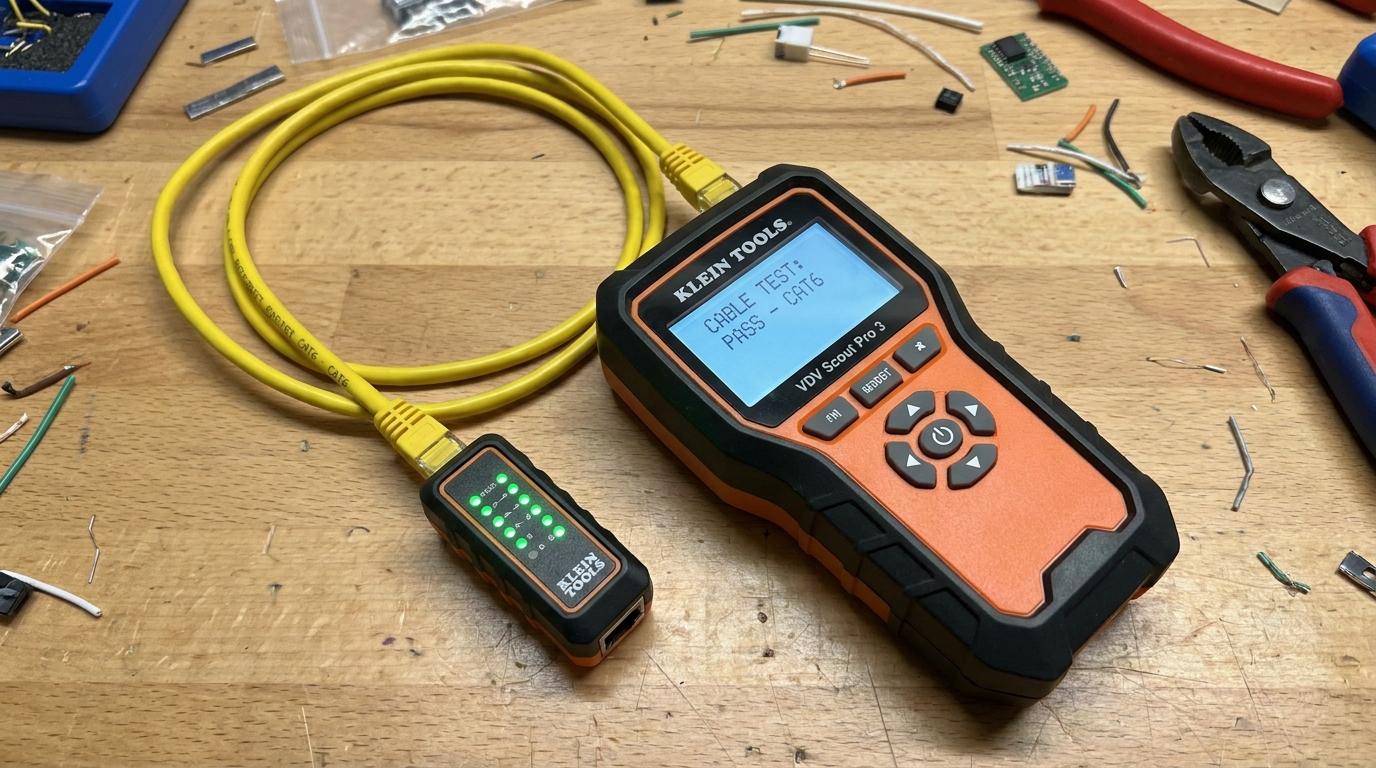
Test the cable
Plug both ends into a cable tester and confirm all 8 wires light up in the correct order before relying on the cable for live equipment.
Verdict: Always terminate both ends to the same standard, and always test before installing — a mis-ordered pair is invisible until the connection starts dropping or refuses to link at full speed.
How-To: Connecting a PoE Switch to a Patch Panel Port
Once your cabling is in and terminated onto the patch panel, linking it to your PoE switch is straightforward. Here's how to do it cleanly and correctly.
Tools & Materials Needed
- Short Cat5e/Cat6 patch lead (typically 0.5m–1m)
- Cable labels or a label printer
- A port schedule or spreadsheet to record mappings
-
1
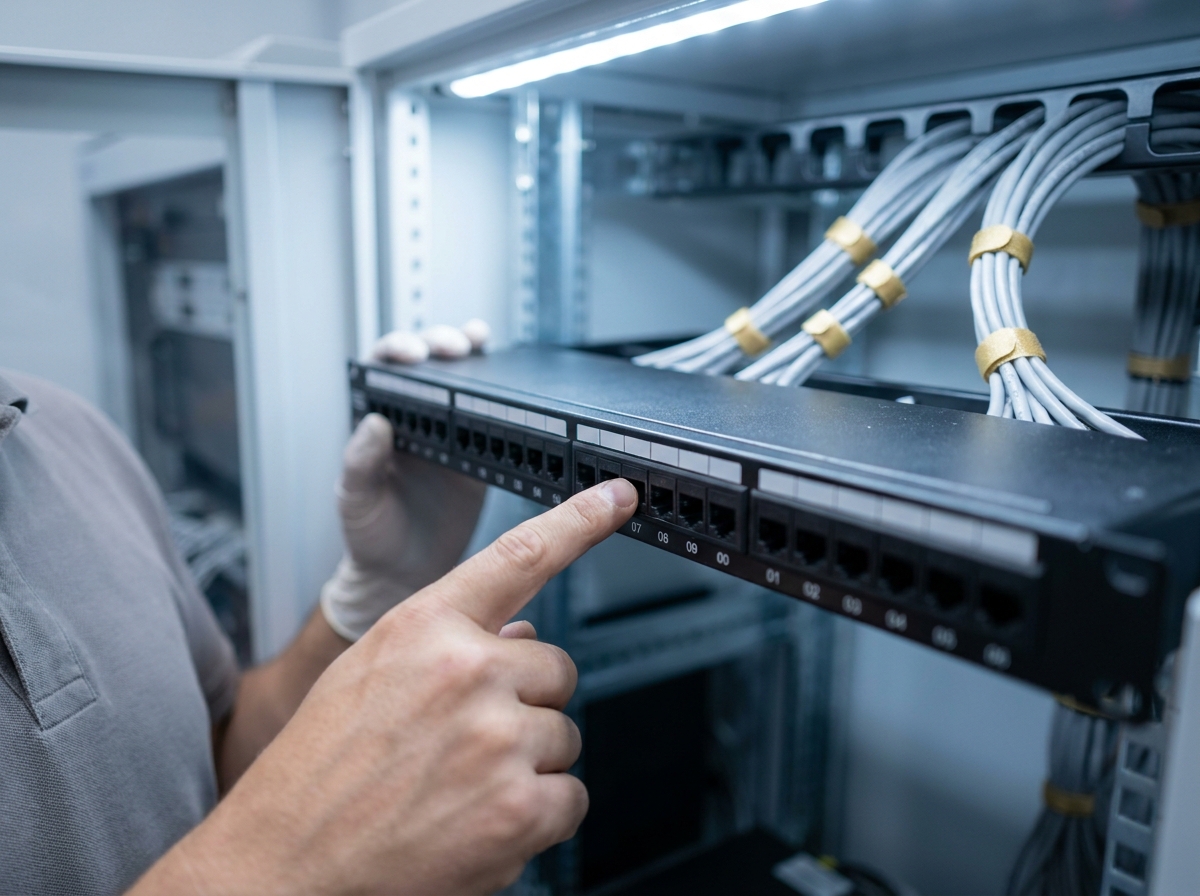
Identify the correct patch panel port
Check the patch panel's port labels against your port schedule to find the port that corresponds to the wall outlet you want to bring live.
-
2
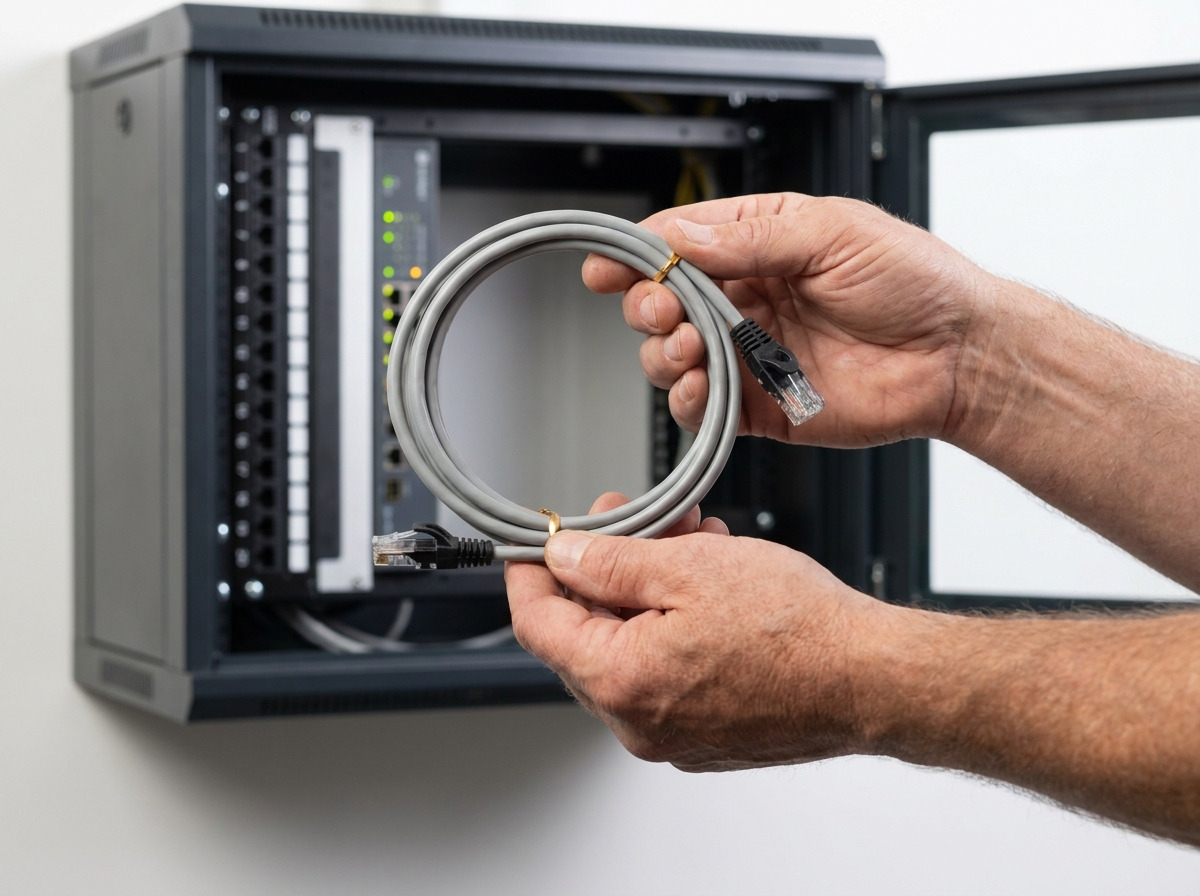
Choose a suitable patch lead
Use a short, factory-made Cat5e/Cat6 patch lead — matching the cable category of your structured cabling — long enough to comfortably reach between the two ports without excess slack.
-
3
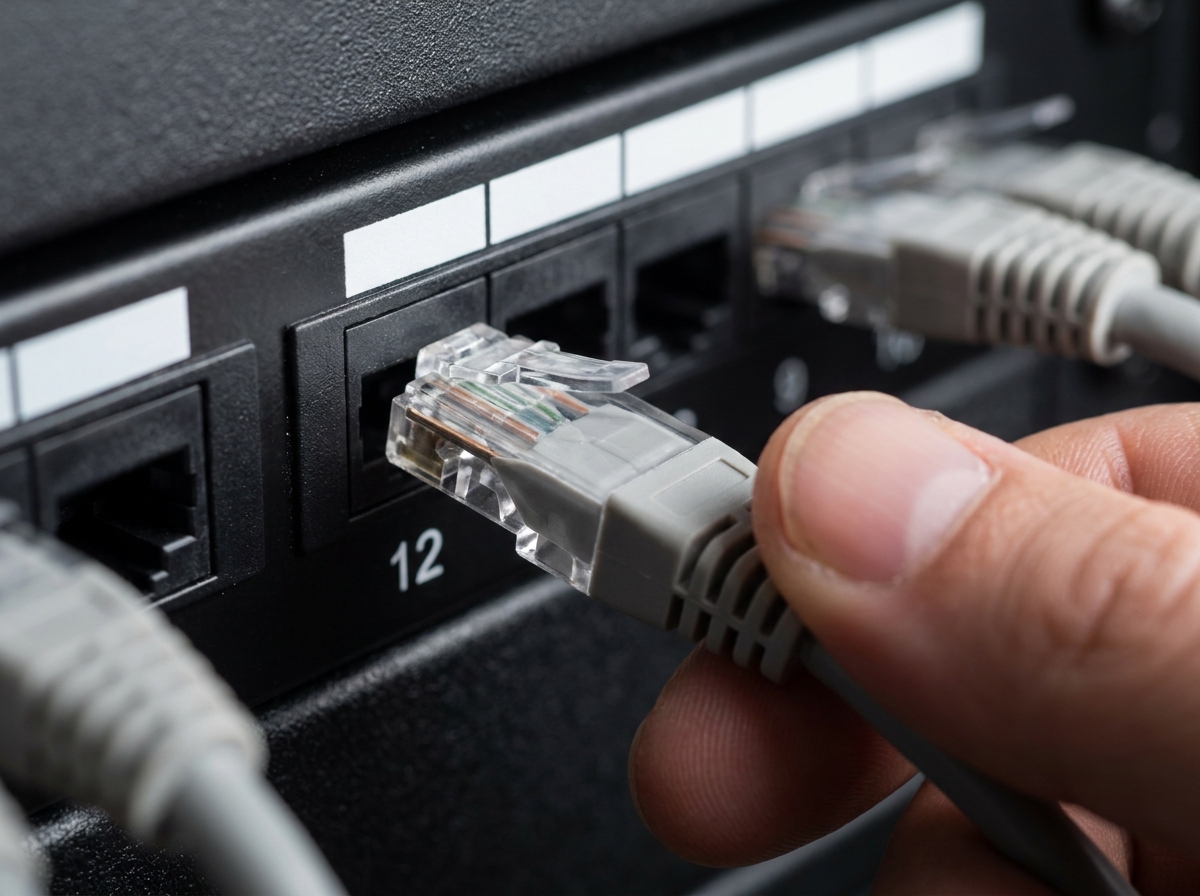
Connect one end to the patch panel
Push the patch lead firmly into the identified patch panel port until it clicks into place.
-
4
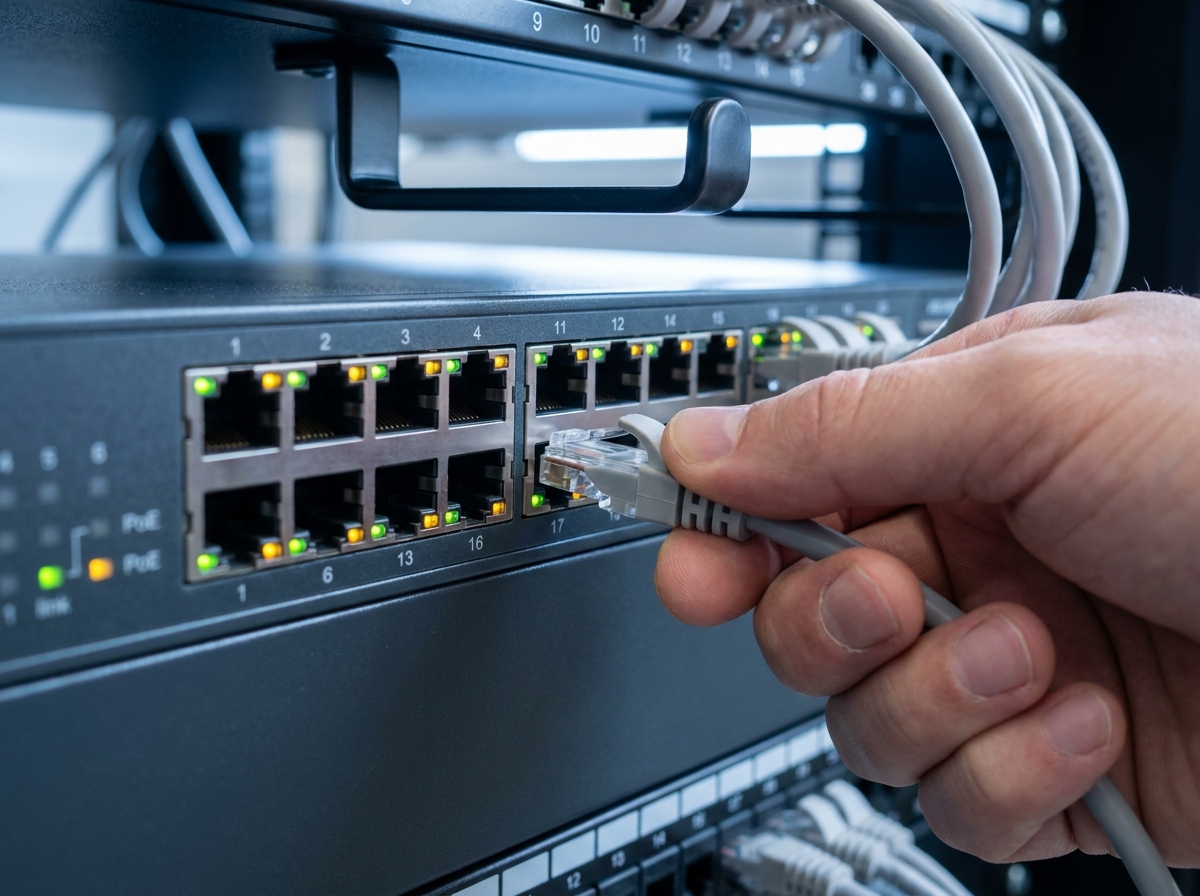
Connect the other end to the PoE switch
Plug the other end of the patch lead into a free port on your PoE switch. Choose a port that supports the PoE standard your device needs (PoE, PoE+, or PoE++).
-
5
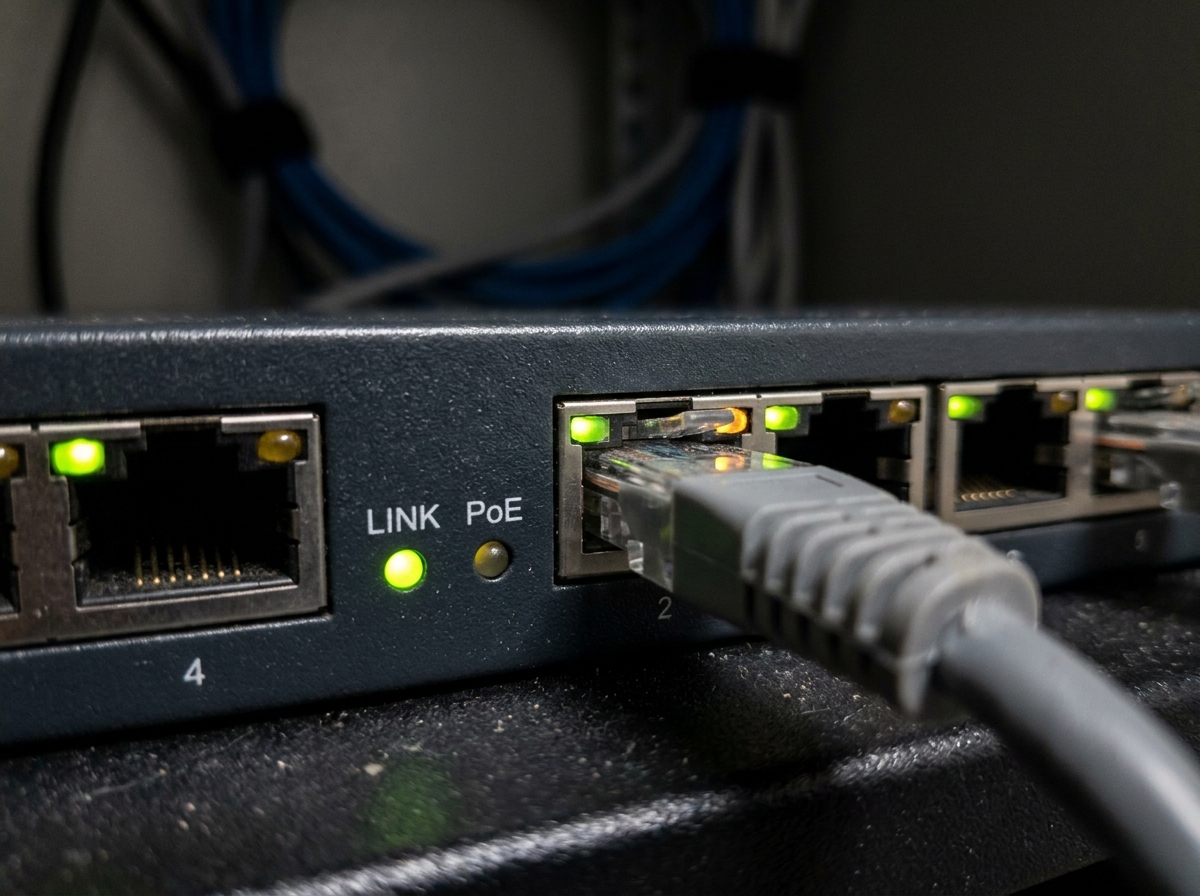
Check the link and PoE status lights
Look for a solid or flashing link light on the switch port, and a separate PoE indicator light if your device draws power — this confirms both data and power are present.
-
6
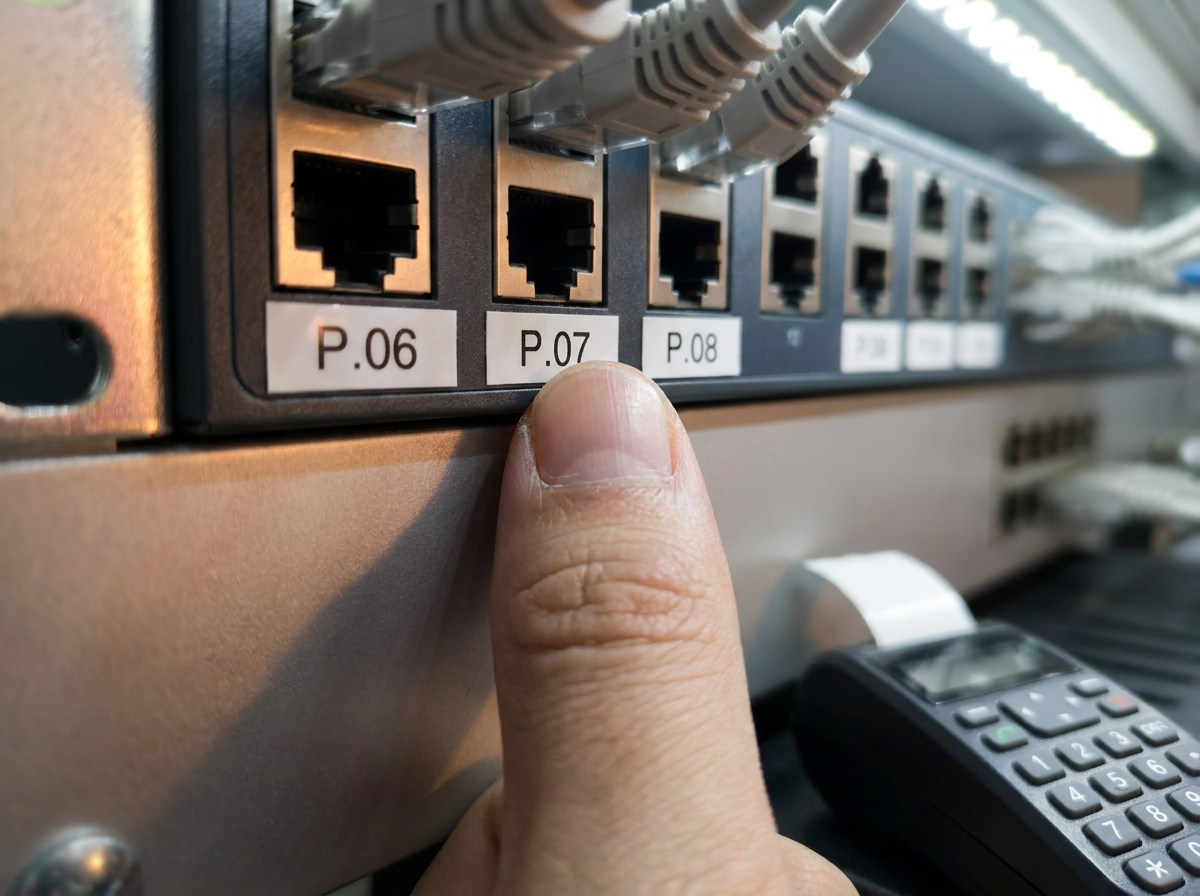
Label the switch port to match
Add a small label to the switch port showing the patch panel port number or wall outlet it connects to, so future changes are quick to trace.
-
7
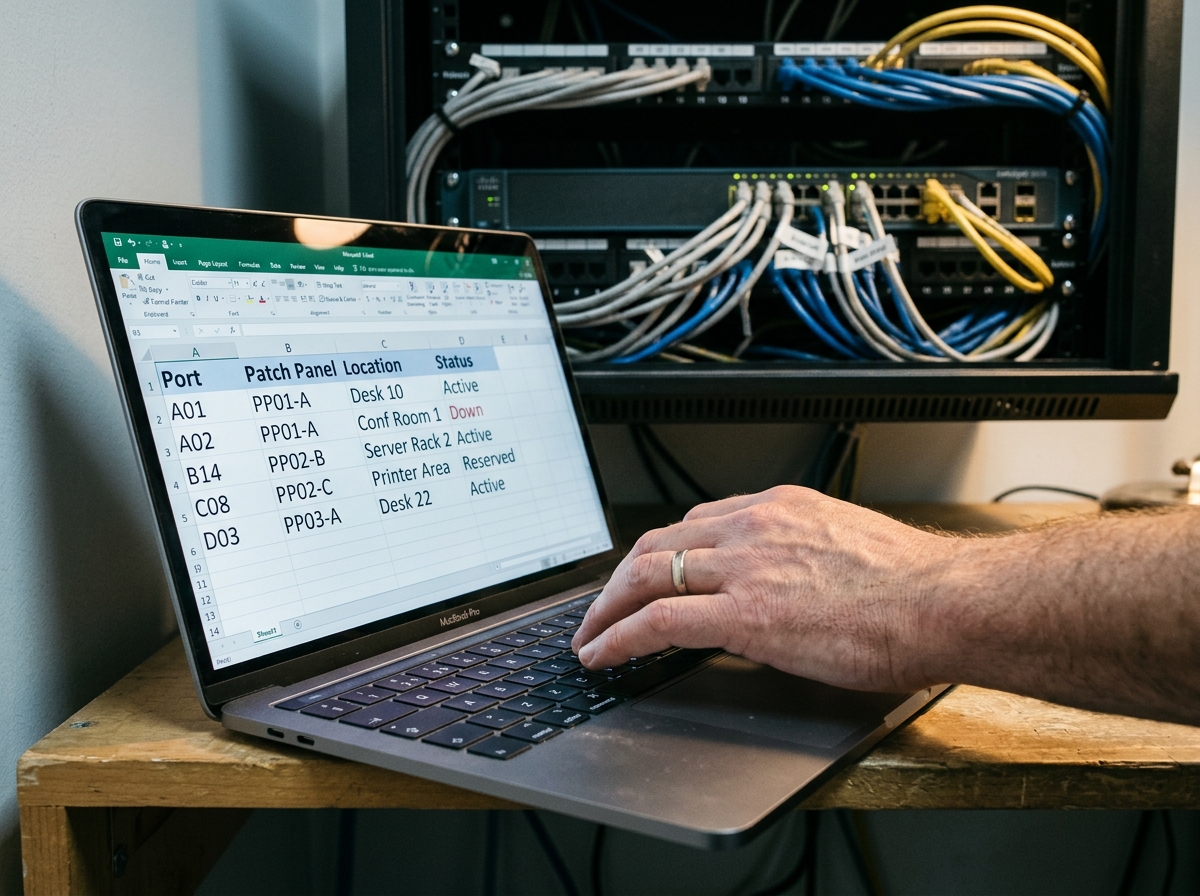
Update your port schedule
Record the new patch panel-to-switch mapping in your port schedule immediately — this single habit saves hours of guesswork during future troubleshooting.
Verdict: The physical connection takes seconds — the labelling and record-keeping is what actually saves time later. Never skip updating the port schedule, even for "temporary" changes.
How-To: Matching a Wall Port to Its Patch Panel Port
When cabling wasn't labelled properly at install (or labels have worn off over time), you need a reliable way to work out which wall socket connects to which patch panel port. Here's the standard method using a tone generator and probe kit.
Tools & Materials Needed
- Tone generator and probe kit (often called a "fox and hound")
- Cable labels or a label printer
- A port schedule or spreadsheet to record mappings
- A second person, or a phone to call between rooms (optional but helpful)
-
1
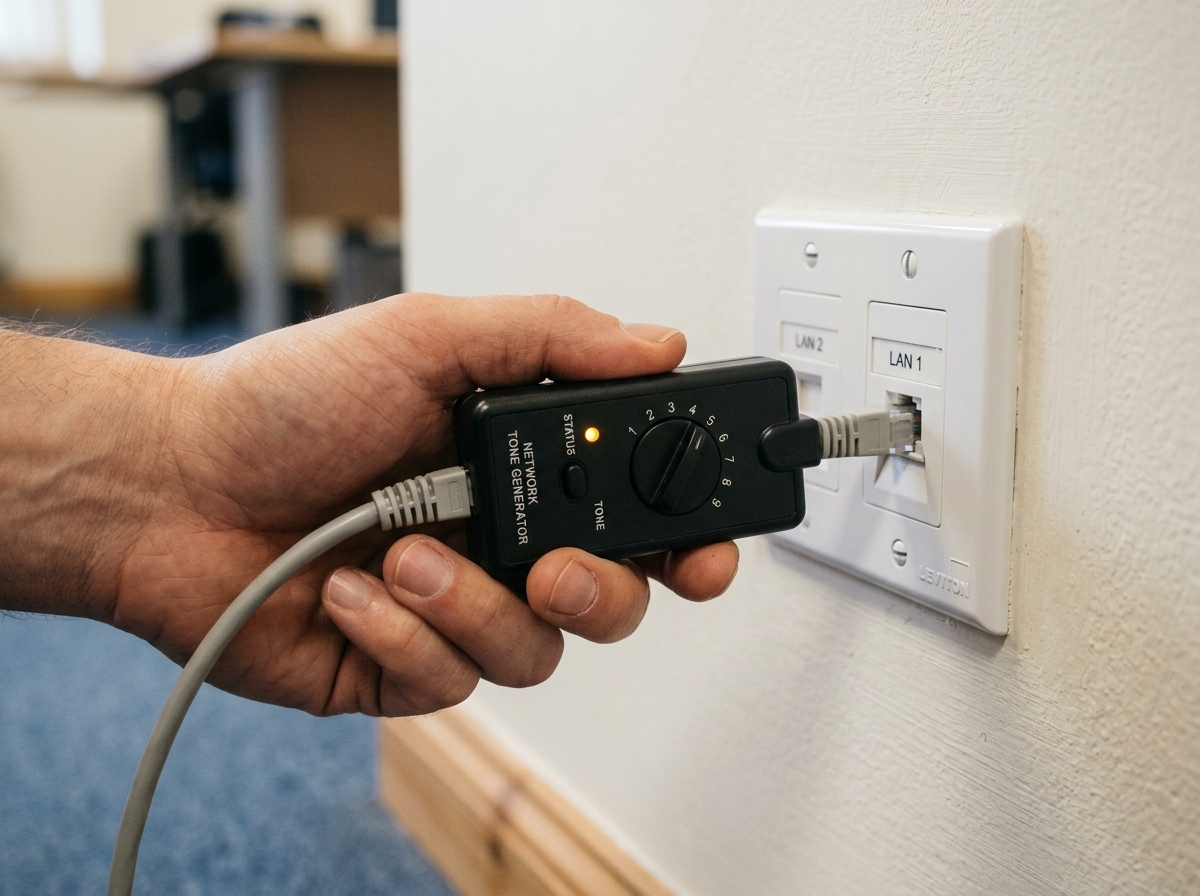
Connect the tone generator to the wall port
Plug the tone generator unit into the wall socket you want to identify. It sends a continuous electrical tone signal down the cable.
-
2
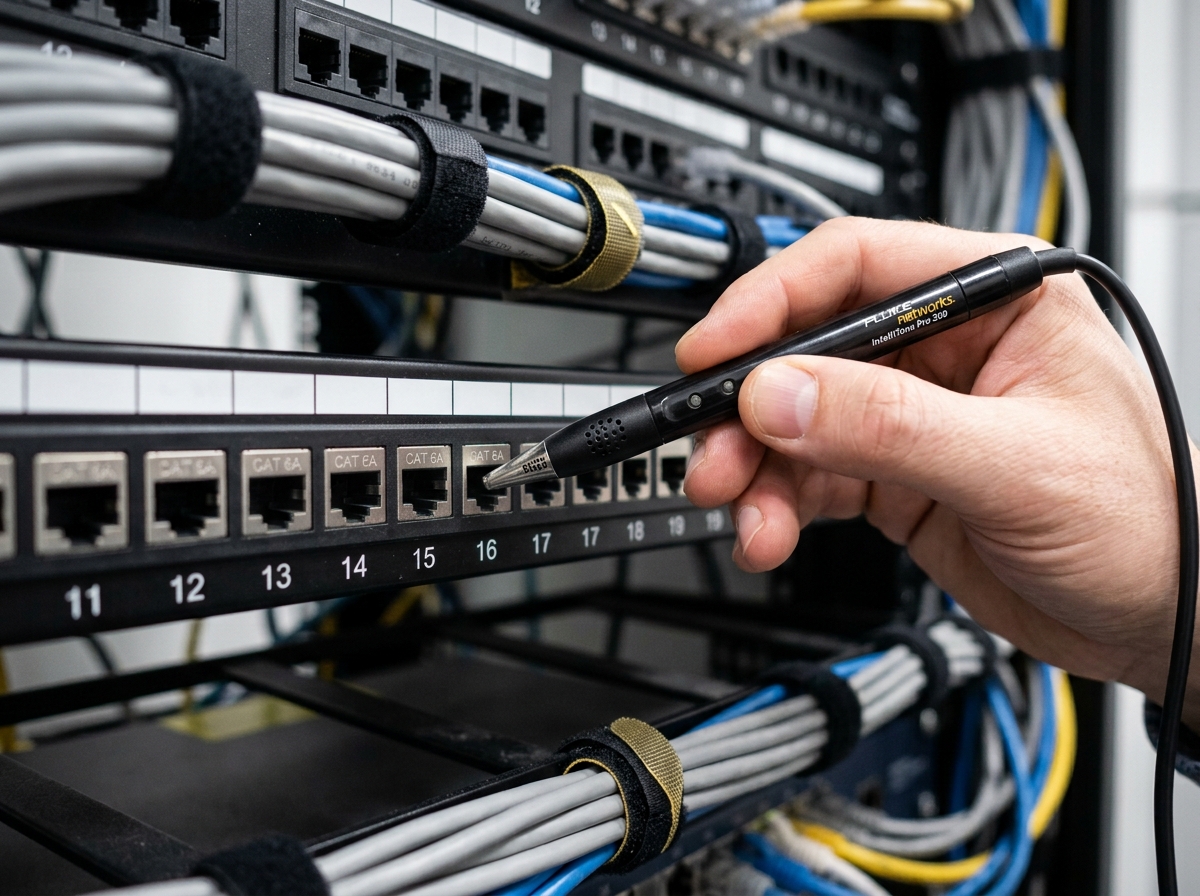
Scan the patch panel with the probe
At the comms cabinet, hold the probe tip close to each patch panel port in turn, moving steadily along the row.
-
3
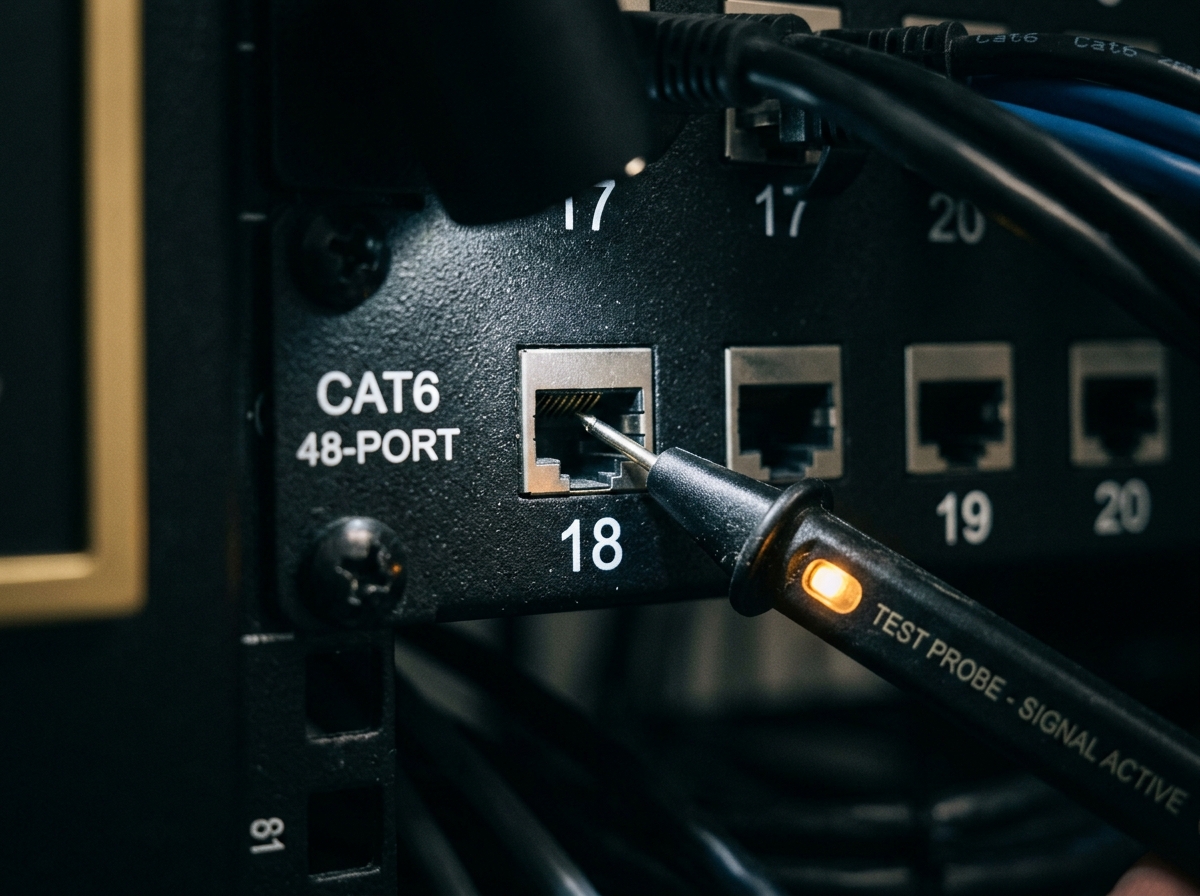
Identify the strongest signal
The probe will beep loudest and clearest at the matching port. Double-check by moving slightly away and back again to confirm it's the strongest point, not just background noise from a neighbouring cable.
-
4
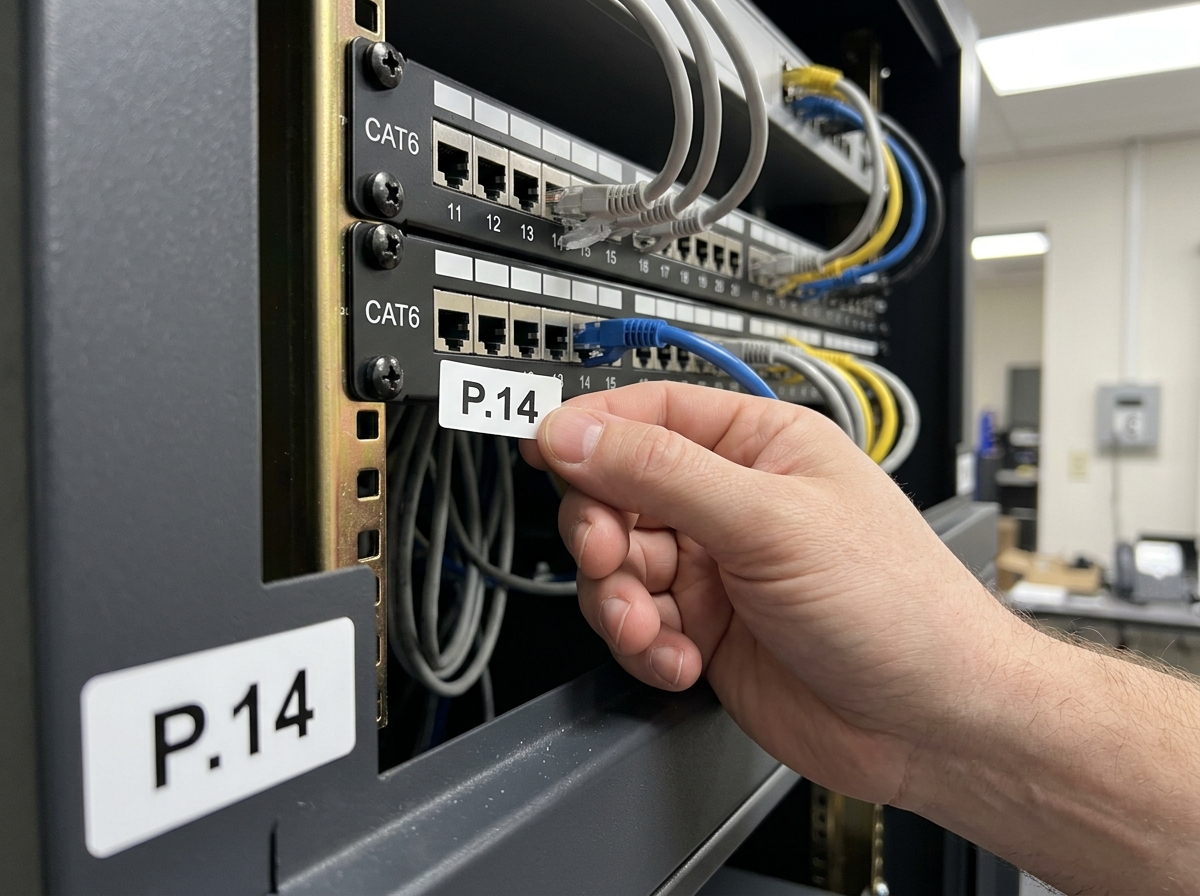
Label both ends to match
Once confirmed, label the wall port and the patch panel port with the same reference (e.g. "Room 2 – Desk A" and "P.14"), so the link is obvious to anyone in future.
-
5
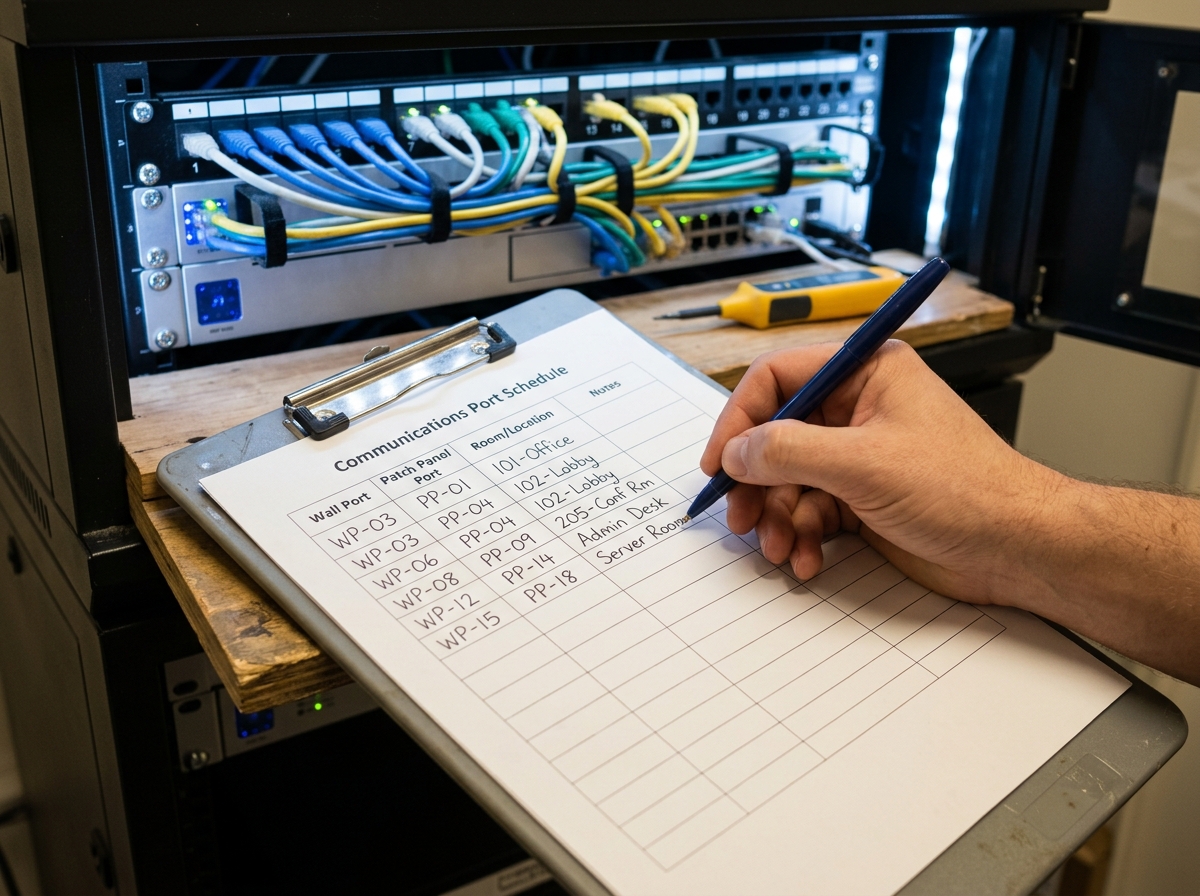
Record the mapping
Add the confirmed pairing to your port schedule straight away. Repeat the process for every unlabelled or uncertain port until the whole cabinet is fully documented.
Verdict: A tone and probe kit is inexpensive and pays for itself the first time you avoid unplugging cables at random to find the right one. Once traced, label immediately — the information is only useful if it's recorded before you move on to the next port.
Planning by Business Type
Every business premises has different networking needs. Expand the section below that matches yours for tailored planning guidance.
For a small office of up to around 10 desks, an 8-port or 16-port managed switch is usually enough, with a single small patch panel if cabling is run through walls. Prioritise a couple of spare ports for future growth and PoE support for phones and a Wi-Fi access point.
Retail spaces typically need reliable wired connections for tills, card machines, and stock devices, plus PoE for CCTV cameras and customer Wi-Fi access points. A small managed switch with PoE+ support, kept in a secure back-office location, covers most single-site shops well.
Warehouse environments often need cabling runs over longer distances and in harsher conditions, so shielded cable (Cat6a or above) and ruggedised or fanless switches are worth considering. Wi-Fi access points for handheld scanners are usually powered via PoE from the same switch.
Multi-floor buildings benefit from a Layer 3 core switch in a central comms room, with a smaller managed switch on each floor connected back via fibre or high-capacity copper backbone. This keeps traffic between floors fast and allows each floor to be managed independently.
A dedicated server room or comms cabinet should have good ventilation, a UPS for power backup, and enough patch panel and switch capacity for at least 30% future growth. Cat6a or Cat8 short runs are common here given the shorter distances and higher device density.
Common Pitfalls to Avoid
Even straightforward network installs go wrong in predictable ways. Here are the mistakes we see most often in business premises.
Mixing cable categories on one run
Running Cat6 cable into a Cat5e patch panel (or vice versa) drops the whole run down to the lowest-rated component. Keep cable, patch panel, and connectors matched end to end.
Exceeding the 100m cable length rule
Ethernet's 100-metre limit includes patch leads at both ends, not just the fixed cable run. Long runs that seem fine on paper can fail once patch leads are added.
Underestimating PoE power budgets
Every switch has a total PoE power budget, not just a per-port limit. Adding several high-power devices (like PTZ cameras) can silently exceed the switch's overall capacity.
No labelling or documentation
An unlabelled comms cabinet turns a five-minute fix into an hour of guesswork. Label every port and keep a port schedule updated from day one.
Undersizing the switch from the start
Buying a switch that exactly matches today's device count means the next new starter or camera forces an unplanned second switch. Always leave headroom.
Poor cable management
Cables bent too sharply, tightly zip-tied, or left tangled in a cabinet can degrade signal quality and make future changes far harder than they need to be.
Troubleshooting Network Problems
Most wired network issues fall into a handful of common patterns. Work through these before assuming the worst.
One device has no connection
Confirm the cable is fully seated at both ends and check for a link light on the switch port. Try the same cable and port with a different device to isolate the fault.
Swap in a known-good patch lead, and try connecting to a different port on the switch in case the original port has failed.
If the wall port itself tests dead even with a known-good lead and switch port, the fixed cabling run may need re-terminating or replacing.
Slow speeds on a wired connection
Check the cable category matches what the port and switch support — a Cat5e lead in a Cat6 setup will cap your speed at 1Gbps regardless of everything else.
Check the switch port's negotiated speed (many managed switches show this in their admin interface) to confirm it's actually linking at full speed, not falling back to a slower rate.
If speeds are still poor on a correctly rated, short cable run, the issue may be a faulty switch, damaged cabling inside a wall or ceiling void, or interference needing a proper cable tester to diagnose.
PoE device won't power up
Confirm the switch port actually supports PoE (not every port on every switch does) and that the device's power requirement fits within the PoE standard that port provides.
Try a different PoE port, and check the switch's total PoE power budget hasn't been exceeded by other connected devices.
If the budget and port both check out, the switch's PoE circuitry itself may have failed, or a standalone PoE injector may be needed as a workaround while it's assessed.
Connection drops intermittently
Check for physical stress on the cable — sharp bends, tight zip ties, or a connector under strain near the wall port or switch are common causes of intermittent faults.
Re-seat both ends of the cable firmly, and check the switch's logs (if managed) for repeated link up/down events on that specific port.
Frequent, unexplained drops on a cable that tests fine can indicate electrical interference nearby (lighting ballasts, motors) or a failing switch port needing proper diagnostic testing.

Watch & Learn
See It Explained on YouTube
Prefer to watch than read? Our YouTube channel breaks down cable types, switches, PoE, and step-by-step how-to guides in plain English — no jargon, no sales pitch.
Visit A2B Network Hub on YouTubeGet Wired Right, First Time
Free, impartial advice on cabling, switches, and PoE for your business — no sales pitch, just straight answers.